
HAnS Instructions - Teachers
This video offers a detailed explanations of the basic interactions with the HAnS system.
While the general user interface should be very intuitive, if you have difficulty finding a particular feature or just want to learn how to use it in advance, you can check out the instructions below.
Uploading a video
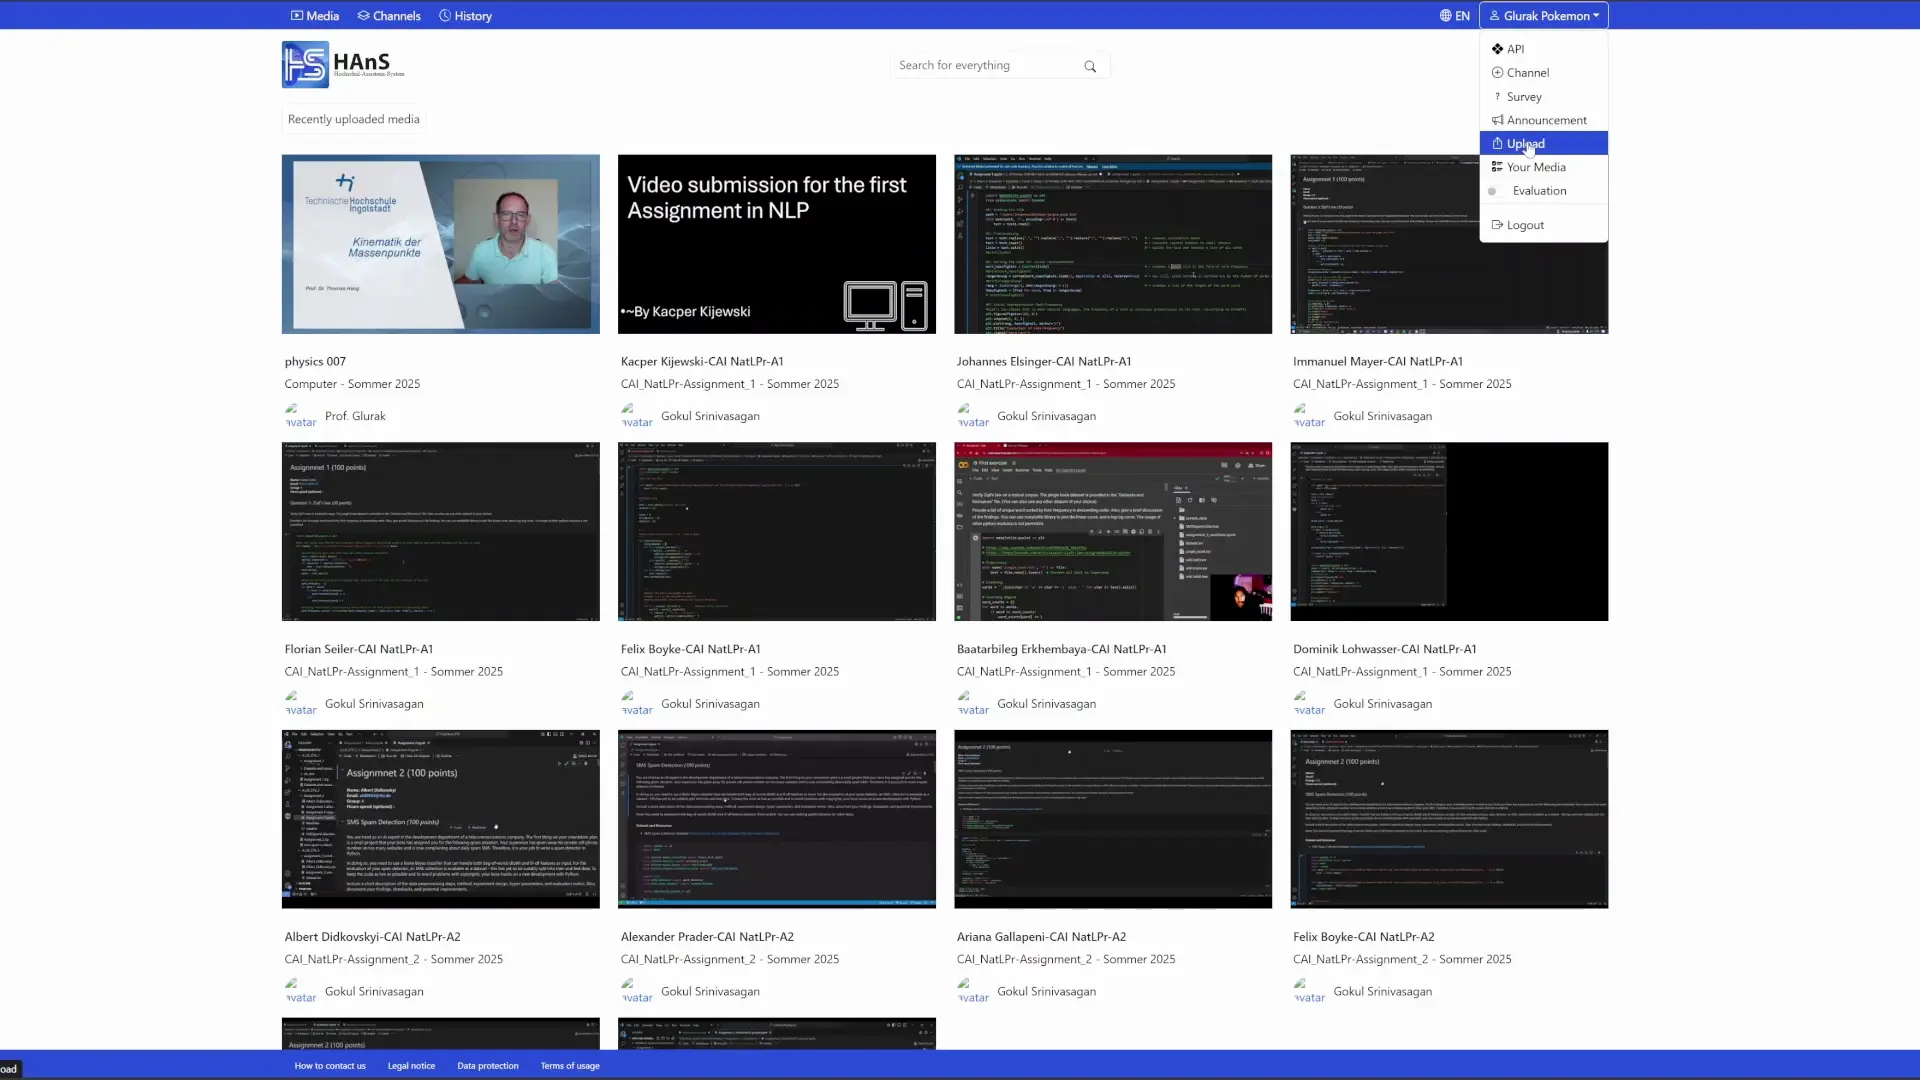
When you open HAnS platform, you will have access to the main set of actions in the dropdown menu in the top-right corner. Uploading a video is one of the options. Once you click it you will be redirected to the relevant interface.
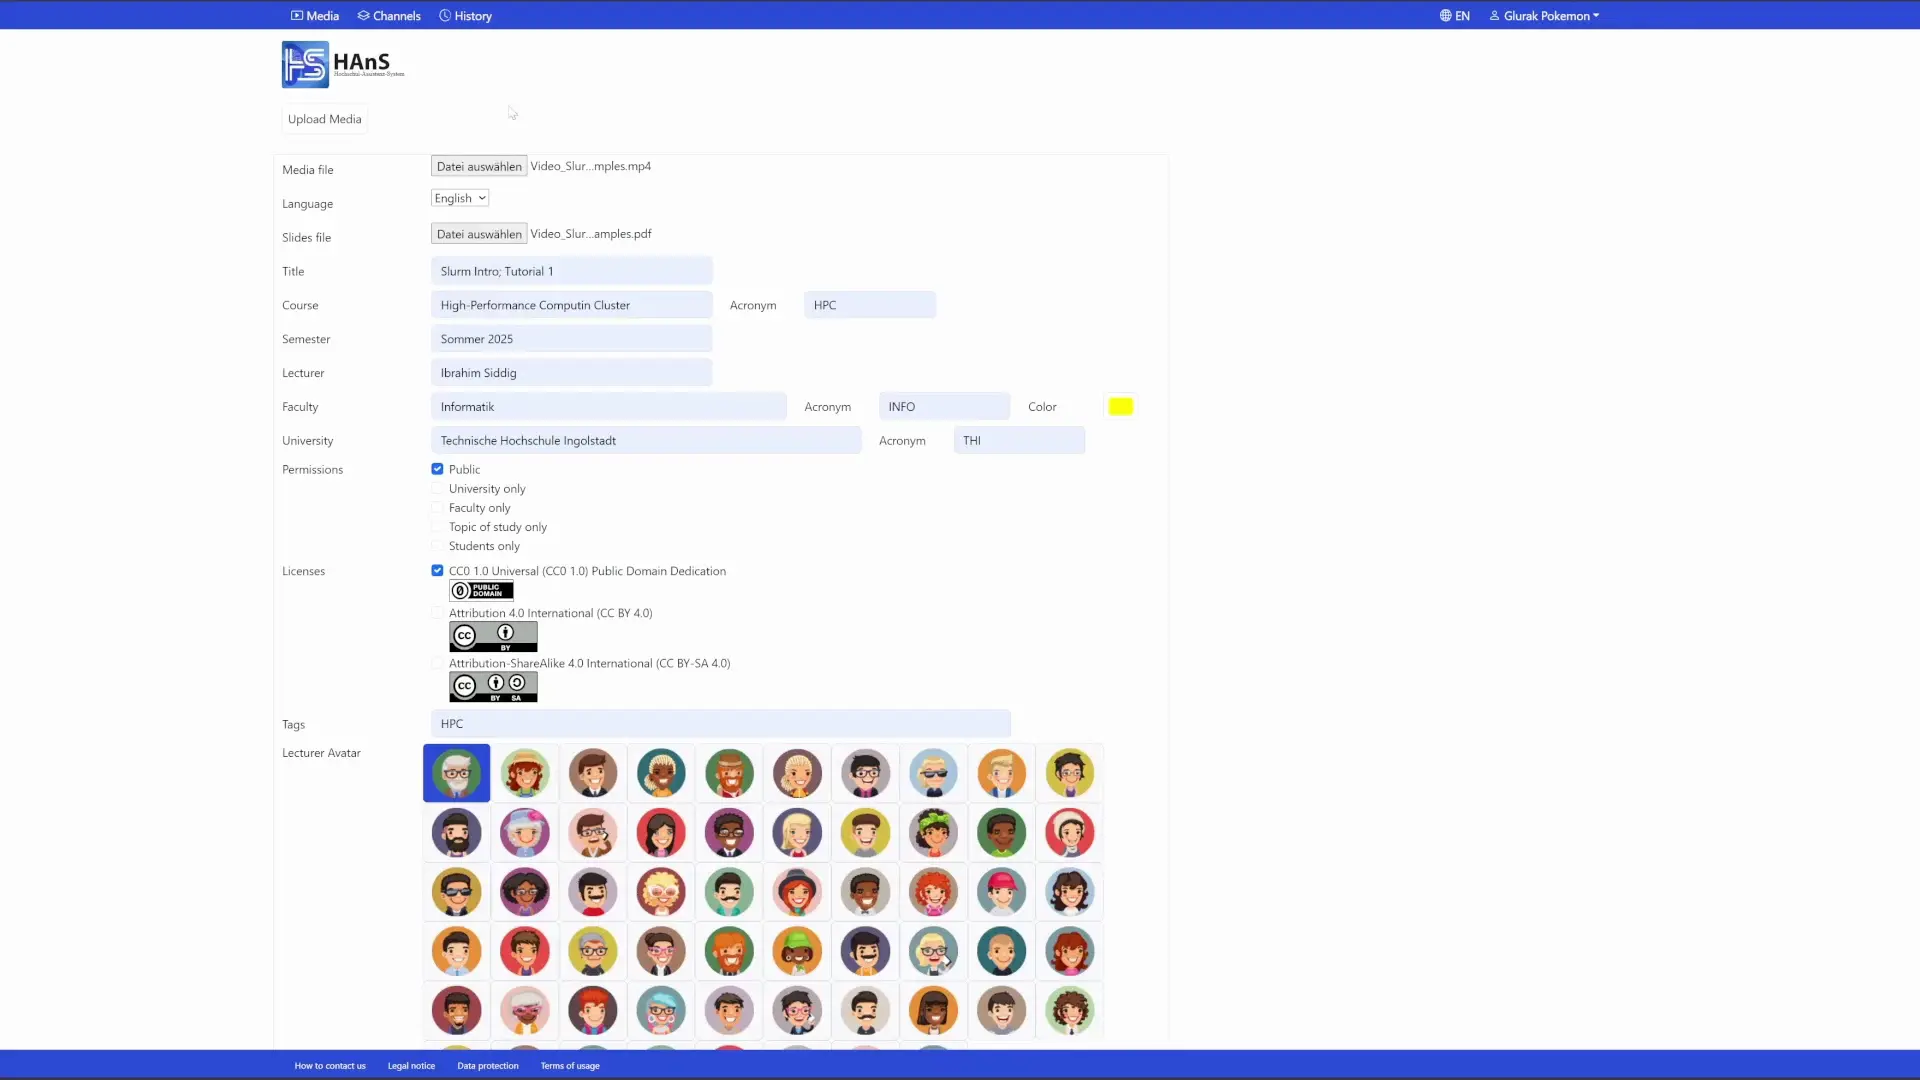
There you will be able to upload the recording of your lecture and your slides, as well as fill out all the relevant information.
Important!
- The recording should be in mp4 format!
- The slides should be in pdf format!
Once you have filled out all the information, click “upload” and wait to be redirected to the next page – don’t try to click it multiple times and don’t leave the page before you are redirected – this might interrupt the upload.
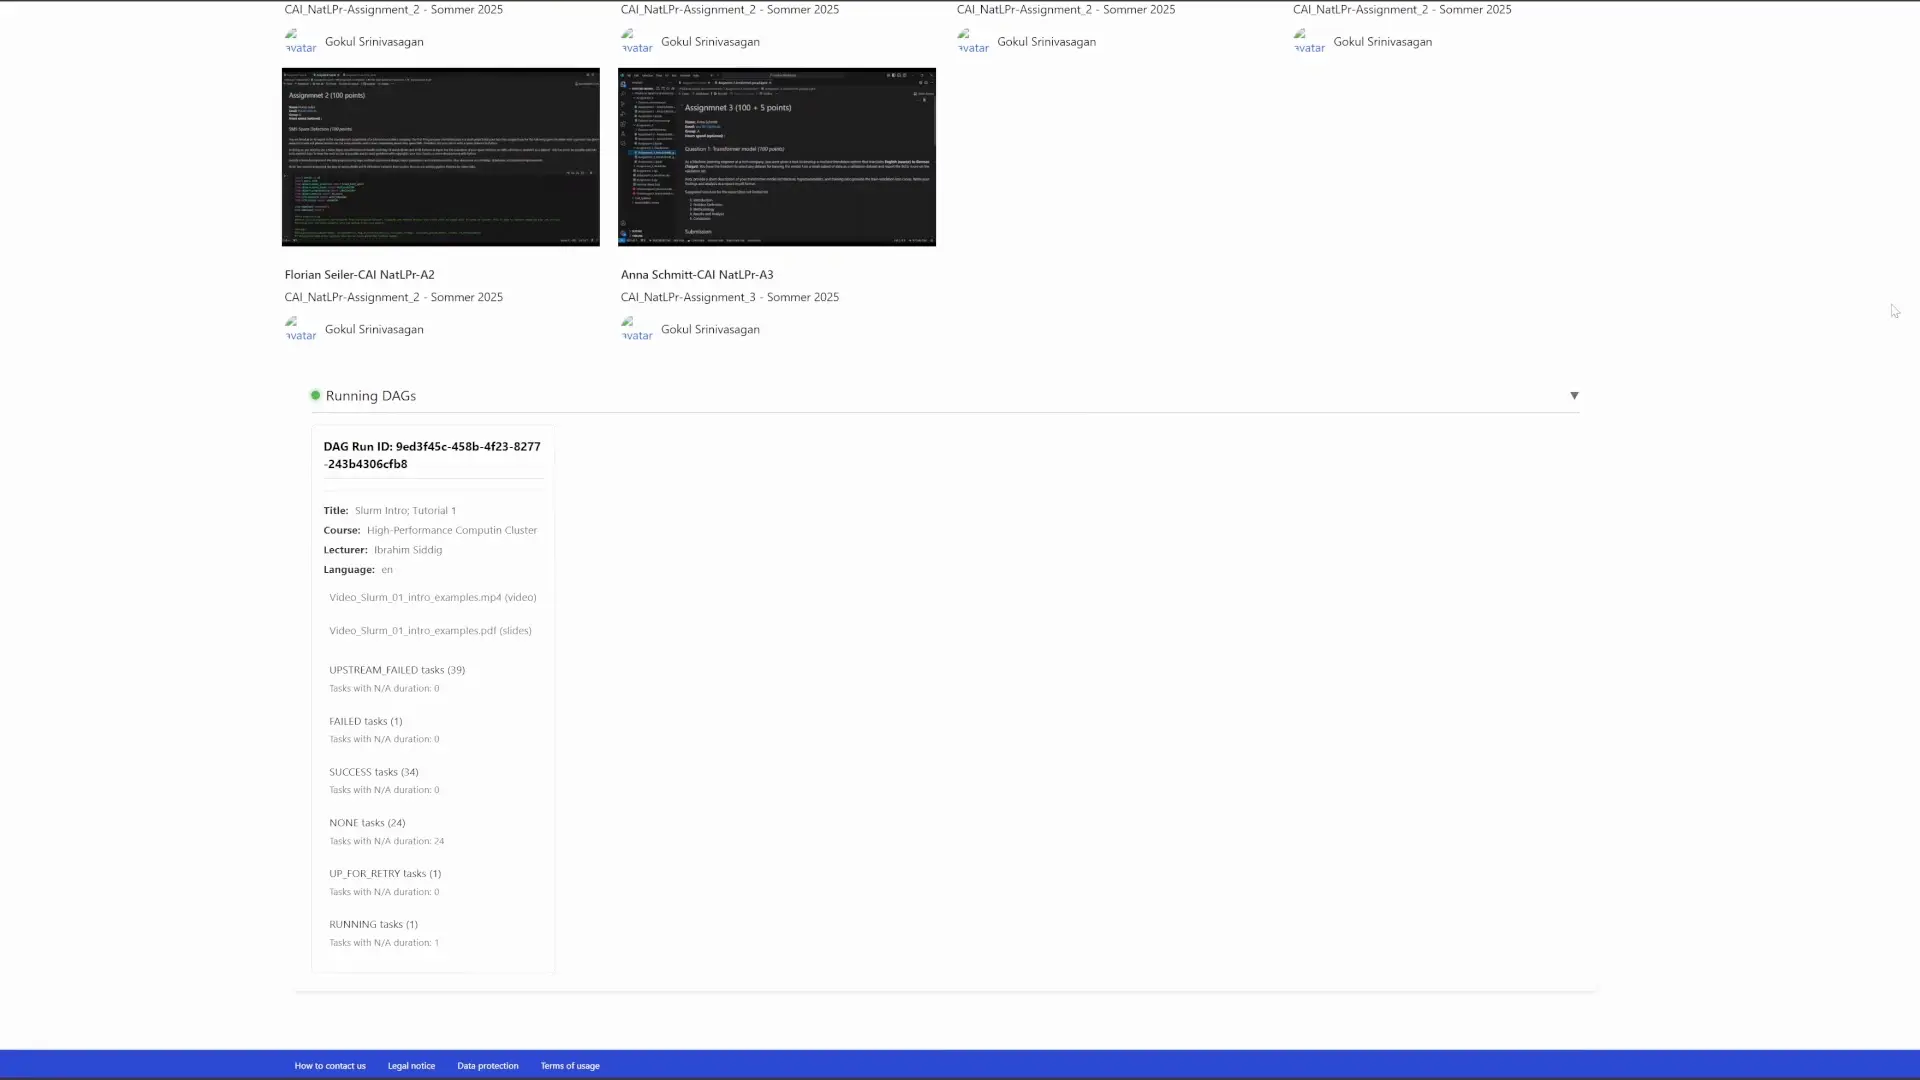
Once the materials have been uploaded, the system needs some time to process it. You can see which of your videos are being processed at the bottom of the main page, under the recent videos:
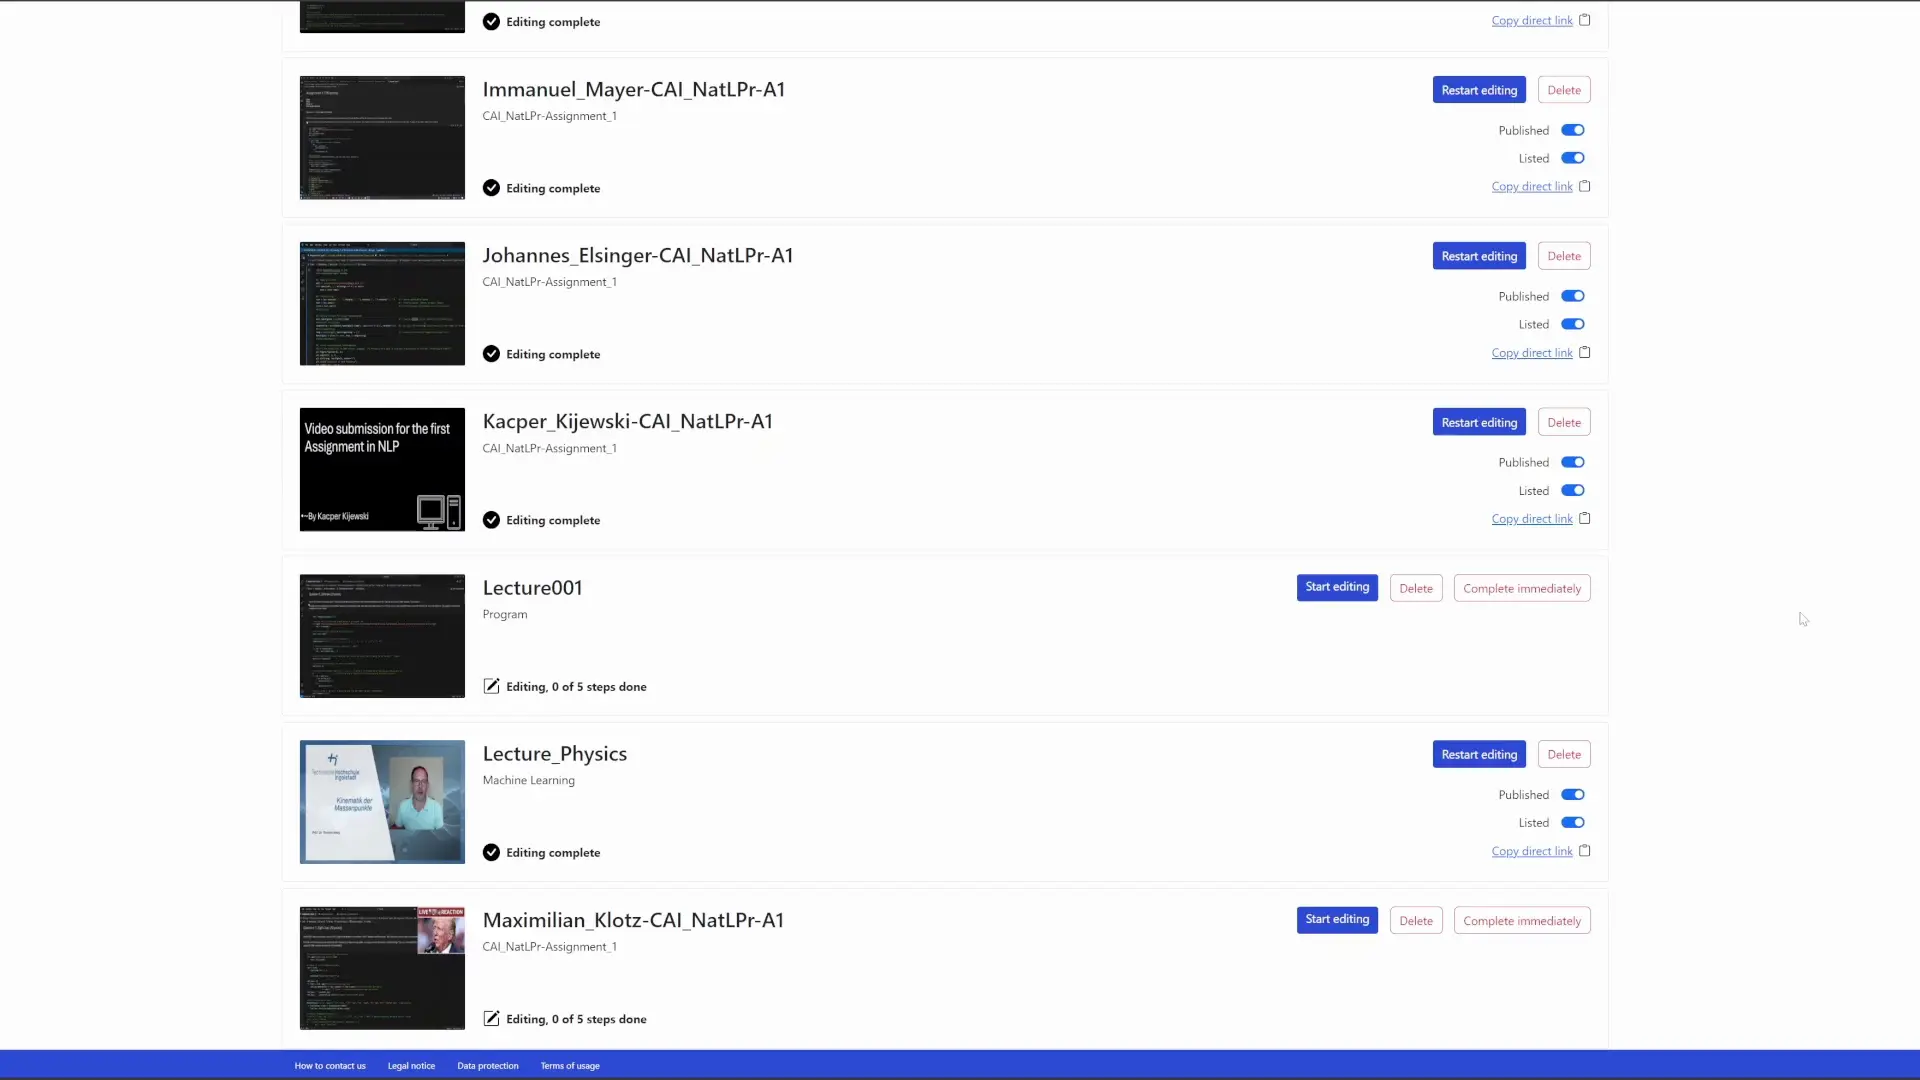
Editing and publishing the processed video
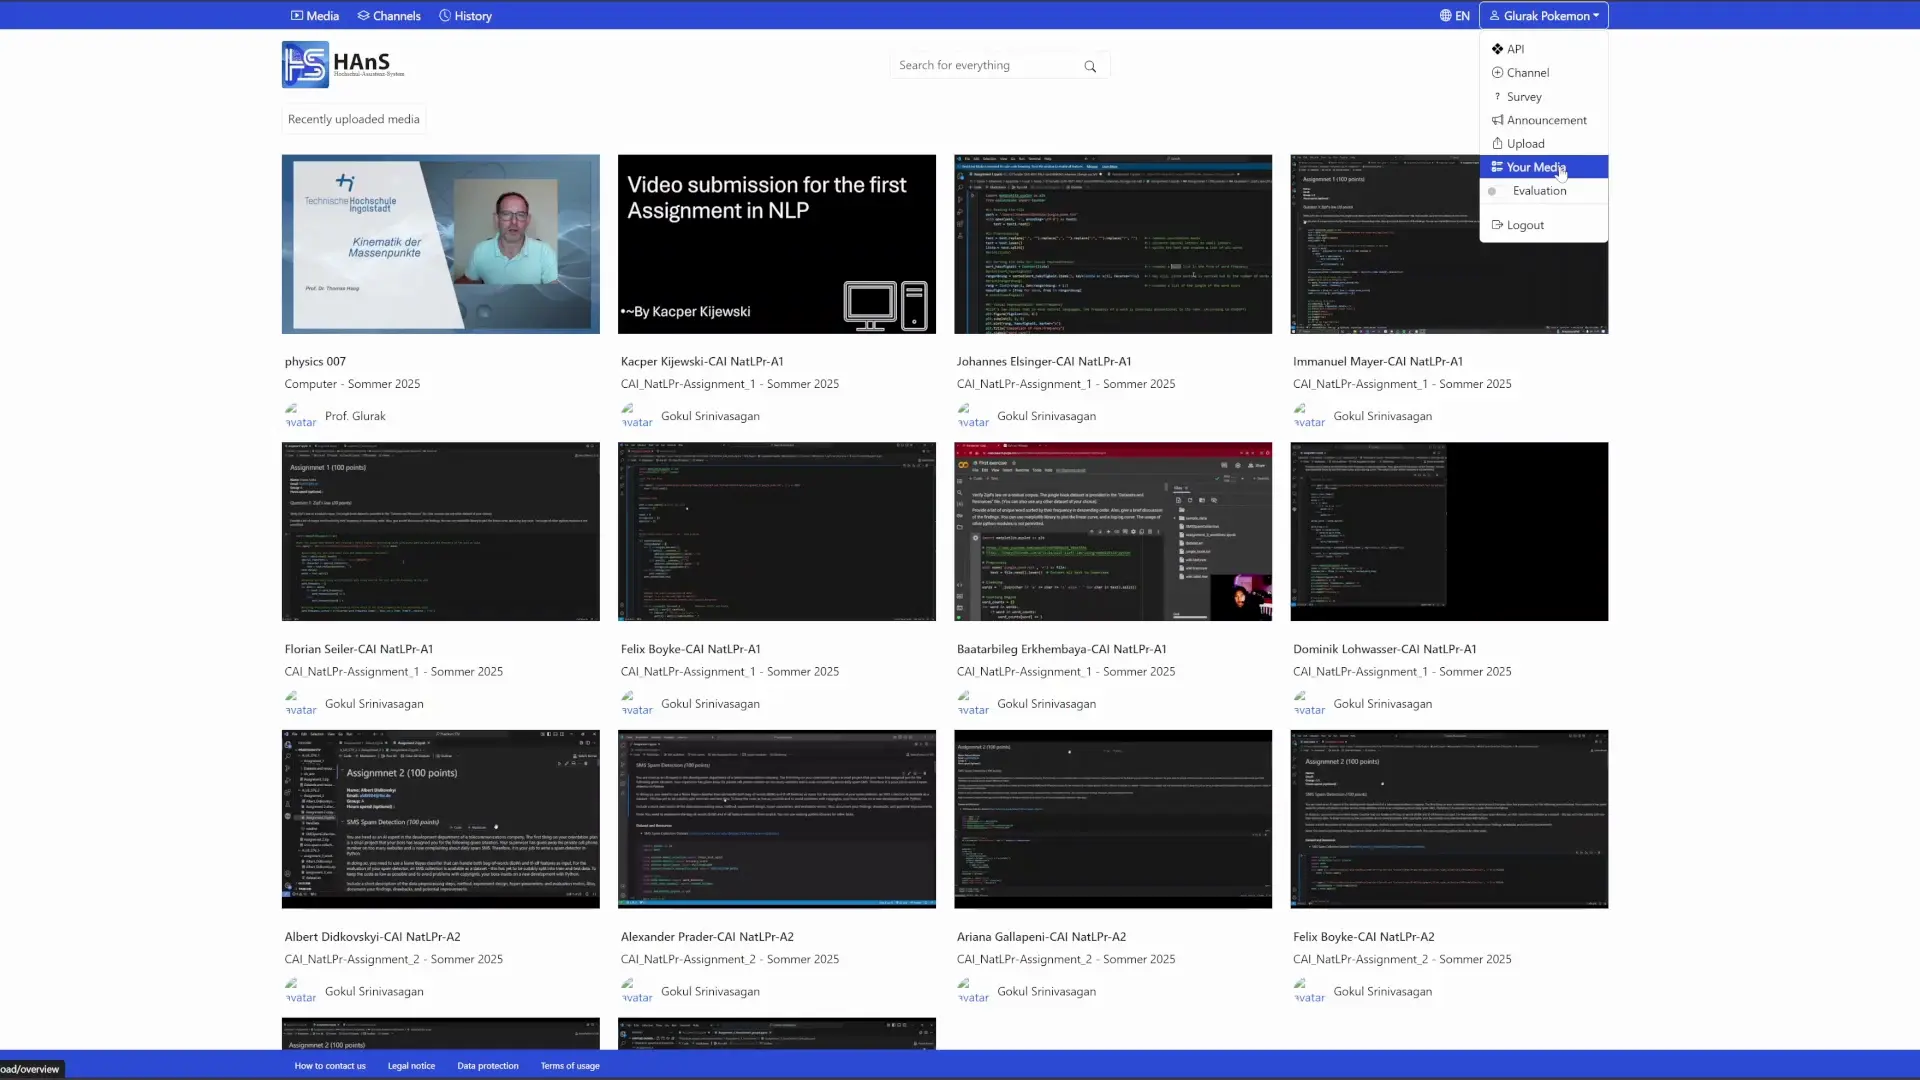
Once the system is done processing your uploaded video and slides, they should appear in your uploaded media list, which you can find in the dropdown menu in the top-right corner.
The system has generated the summary, the transcript, as well as all the other data. You can (and should!) review it by clicking the “start editing” button – this will present to you the generated content to review and edit, step by step. After you are done, in the same list you will see two toggles – “published” and “listed”. To share the video with the students you should usually just activated them both – after that the students will be able to search for your videos and find them in all the relevant areas.
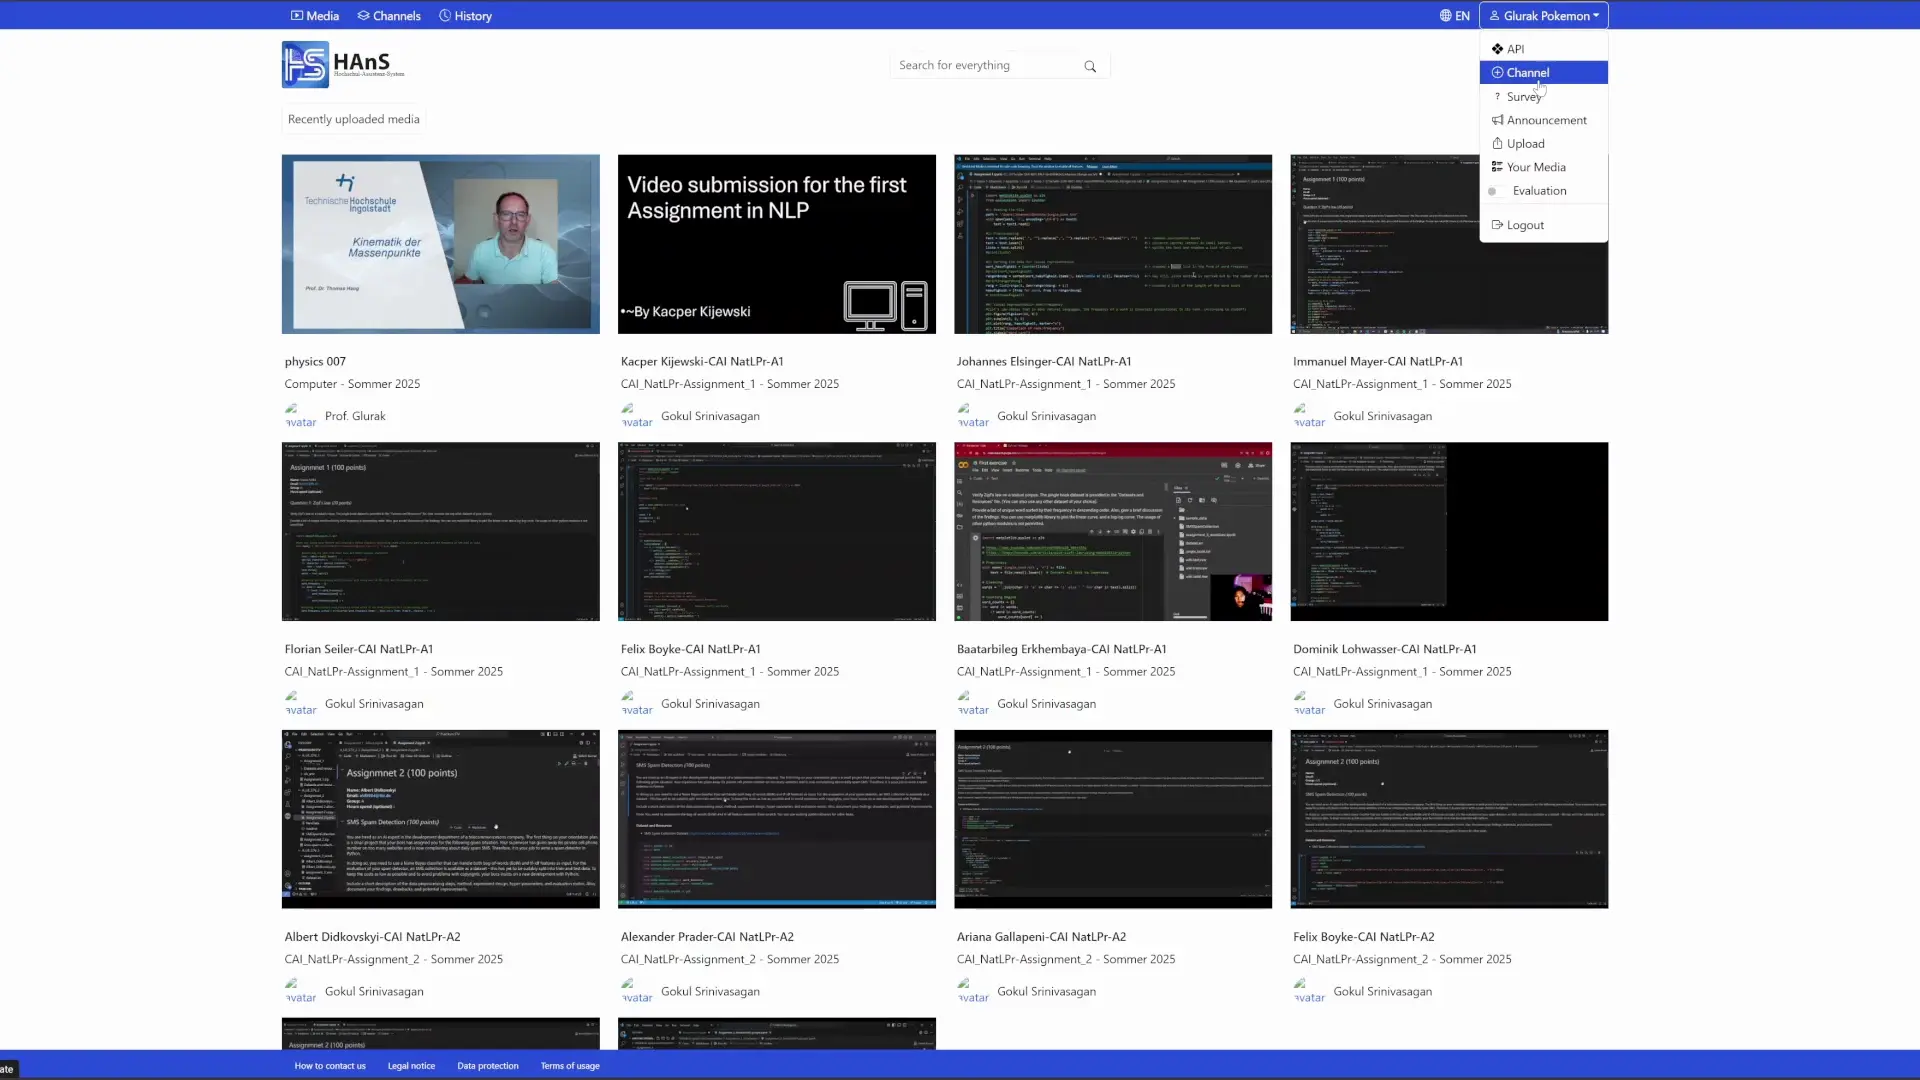
Creating your own channel
If you want the students to be able to find a series of lectures on a single topic or from a single course in a single place, you can create several channels. In the same main menu in the top-right corner you can find the section titled “channel”.
There you can fill out all the relevant information and the videos will be automatically assigned to that channel in the relevant section.
- Important! For the video to be assigned to the channel, listed course, semester and lecturer for the channel and the video have to match!


![[Translate to English:] Logo Akkreditierungsrat: Systemakkreditiert](/fileadmin/_processed_/2/8/csm_AR-Siegel_Systemakkreditierung_bc4ea3377d.webp)


![[Translate to English:] Logo IHK Ausbildungsbetrieb 2023](/fileadmin/_processed_/6/0/csm_IHK_Ausbildungsbetrieb_digital_2023_6850f47537.webp)